


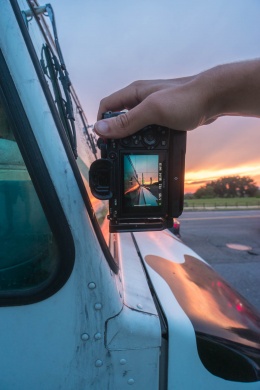


Traveling to a new photo location can be fun and exciting but also intimidating. You’ve seen all these beautiful images on Instagram before your trip that got you hyped about travel but how can you actually capture images that compare? You’re only visiting this city for a limited amount of time. The pictures you’re seeing on social media are from locals who have spent almost the entire year in this location. They have the luxury of time and patience for the right weather conditions and lighting. You only have a limited amount of time before you have to hop back onto your flight home.
HERE’S HOW TO DO IT:
The key to creating memorable images are creative compositions that show your unique point of view of what it was like being there. Everyone knows what the Eiffel tower looks like, but only you see it with your unique, photographic eye. With a slightly different mindset and perspective on photography, you can make images that stun your friends and locals alike.
So here are a few tips I have compiled that may have you thinking a little more while you are out shooting, but they will be sure to make your images stand out from the mundane tourist images that others are taking. These are also good for any level of photographer, mobile or DSLR, so be sure to send this link to your friends!
Also, if you need a little help prior to your trip about planning your photo locations, click here for a few tips on how to do that effectively.
So pack your camera equipment and let’s go!
1. Tell A Story
One of the most important things you can do to capture a unique/creative image while traveling is to tell a story. It makes your viewer want to read more into the image making it more memorable and adds your own voice to the image. It sounds a lot easier said than done. But there are multiple ways of doing this.
First of all, think about the context of your photo. For instance, if you’re traveling to Japan, a great way to give context to your photo is by photographing a storefront or somewhere that has Japanese characters. It’s funny because a lot of places in Asia will also have English letters, so if you capture that in your image it could confuse the story a bit. Pay attention to the entire environment including the background. Does it match what you’re trying to say with the foreground? Do all the elements tell the entire story of what it’s like being at your travel destination?
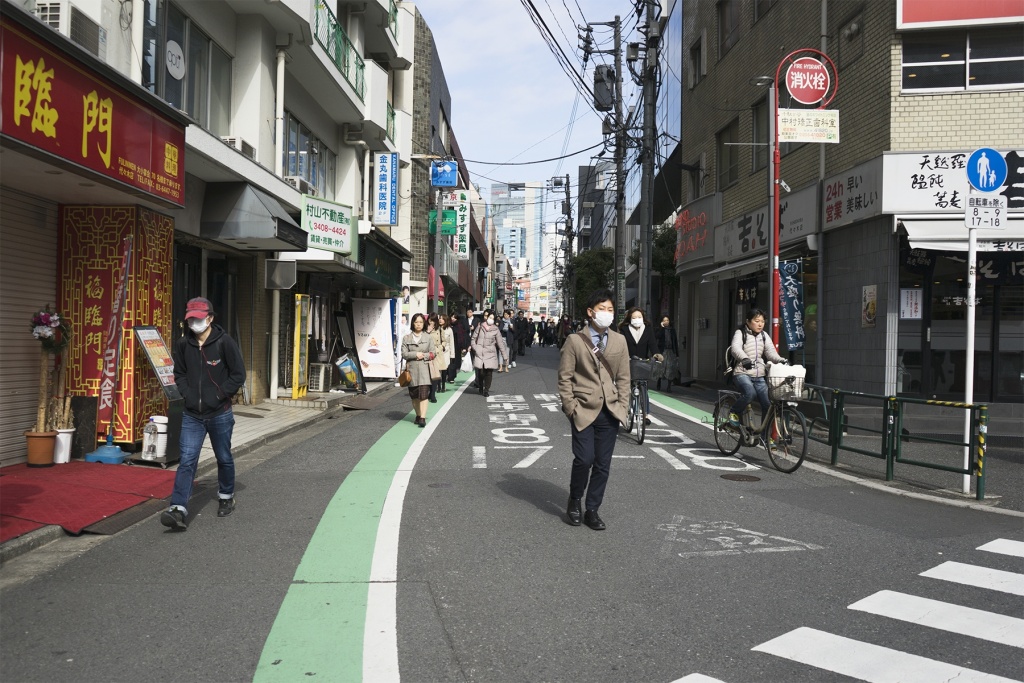
A typical street scene in Tokyo, Japan. I was fascinated by how there are so many people in the city yet everyone was still so orderly, walking in single-file lines along the street.
Emotions are an extremely powerful way to convey a story as well. You can convey emotions by capturing a portrait of a local, photographing an angry, sky or harnessing what you’re feeling at the moment of the capture and add more emotions in your post-processing editing. If you are feeling light and uplifting, convey that in your editing. If you are feeling sad and down, making your image dark with harsh contrast will help portray that emotion. Portraying some kind of emotion in your image helps round out the story.
You should also consider the advantages of a single image vs multiple image series. Sometimes a single frame isn’t enough to tell what it was like being at your location. Making a series may tell the story better. It may sound silly, but I know when I’ve captured something good, my mind immediately goes to how I would explain the image to a friend. So if one image isn’t enough, consider taking multiple at different points in time or the same subject but with different vantage points.
The best way to prepare your image for storytelling is by knowing how to use your camera and be ready to capture anything. You never know when something photo-worthy will happen.
2. Change Your Perspective
This may take some time getting used to but the more you change your perspective, the more your images will stick out from the crowd. What I mean by that is that you will see typical tourists taking all their pictures from eye level. It’s the most logical point of view, so you’re going to capture your images like that. But if you change your perspective, meaning getting down low to capture your shots, look up, look behind you, stand on a park bench, you’re images will be totally different because you’re seeing the world in a totally different way. So changing your perspective already makes your images unique and creative.
For example:
Looking Down vs. Looking Up
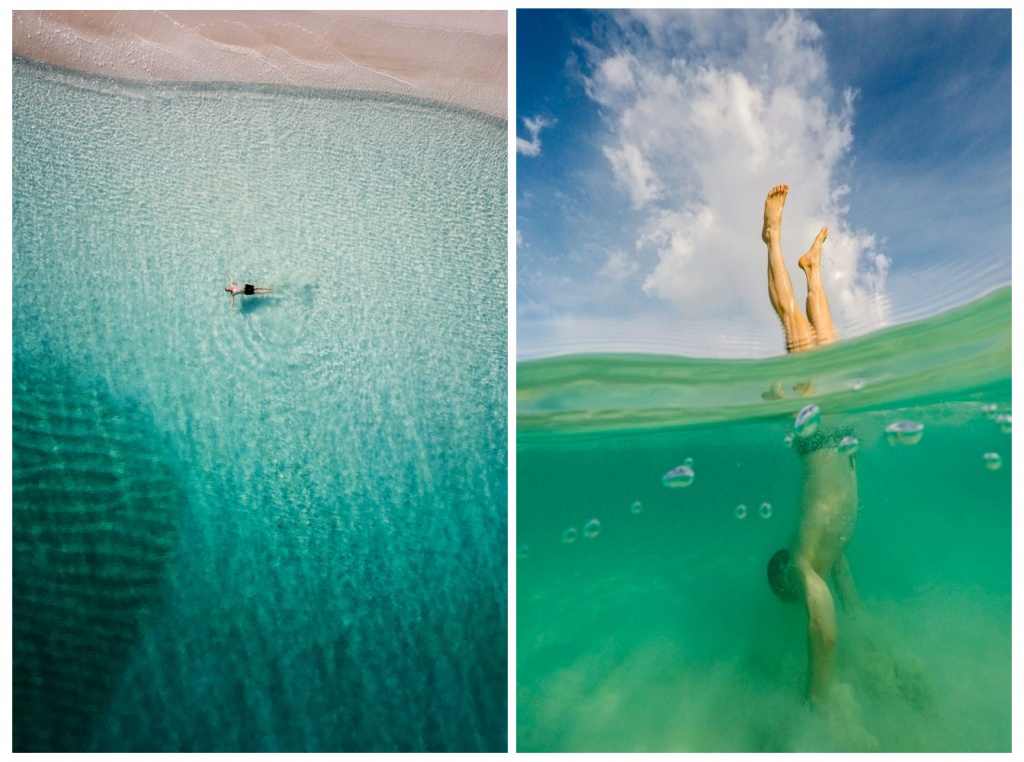
(L) Taken from far above with a drone (R) Taken down low with a GoPro. You can see how these two similar scenes look completely different when taken from different angles.
Telephoto vs Wide Angle.
Even changing your lens to change your perspective makes a big difference.
Taken at the same time but with two different lenses. (L) Wide-angle shot but I also got down low to capture it (R) Telephoto version of the same scene
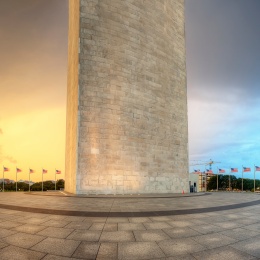
3. Sense of Scale
Have you ever gone somewhere and captured an awe-inspiring image of a mountain at sunset? The light, the colors, everything was absolutely perfect. You are going to go home and show everyone just how amazing this whole experience was but when you look at the image you captured, the mountains just don’t look as grand as the way you remembered seeing it in real life? Perhaps the way you captured it actually makes the mountain look really small. But how could they be? They are larger than life!
Adding a sense of scale to your image can really help your viewer see how big or small your subject actually is. Adding something for scale that everyone knows the basic size of will work well. For instance, people have a general idea of an average person’s height. If you add them in front of a mountain or waterfall, it gives your viewer a much better idea of how big the geological wonders are.
For those of us who have never been to your location, adding scale can really help give your viewers all the necessary information.
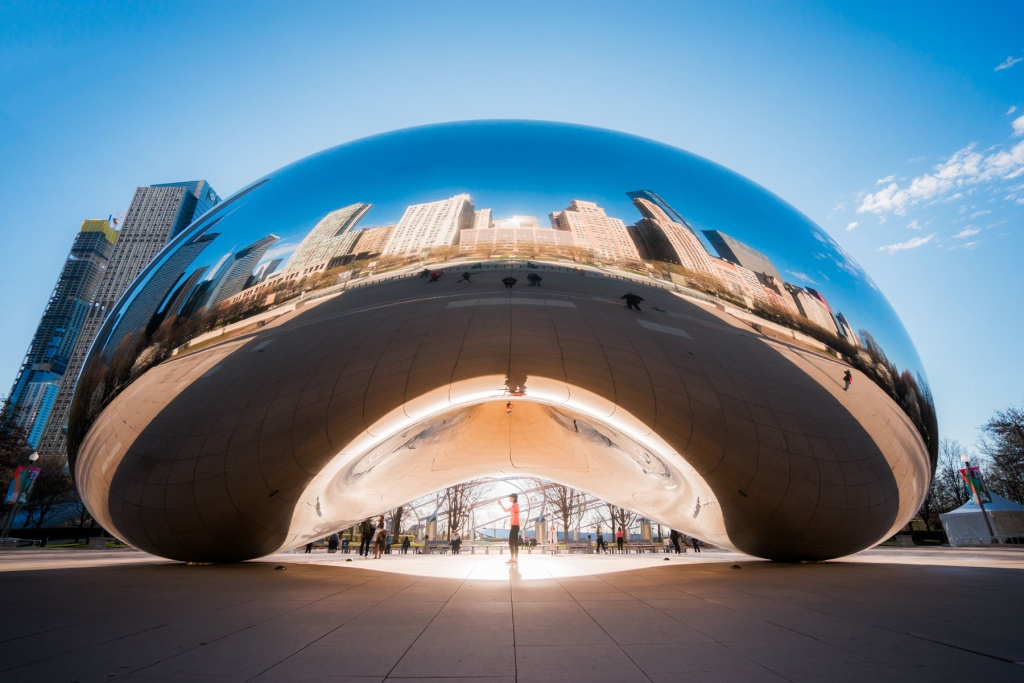
If you’ve never been to Chicago before, you may not know how large the Cloud Gate “the bean” actually is. Having that single person there adds some scale to the image to show just how large it is.
All rules are meant to be broken so you can also use scale to play tricks on the eye and mind. These are some of my favorite types of images to capture.
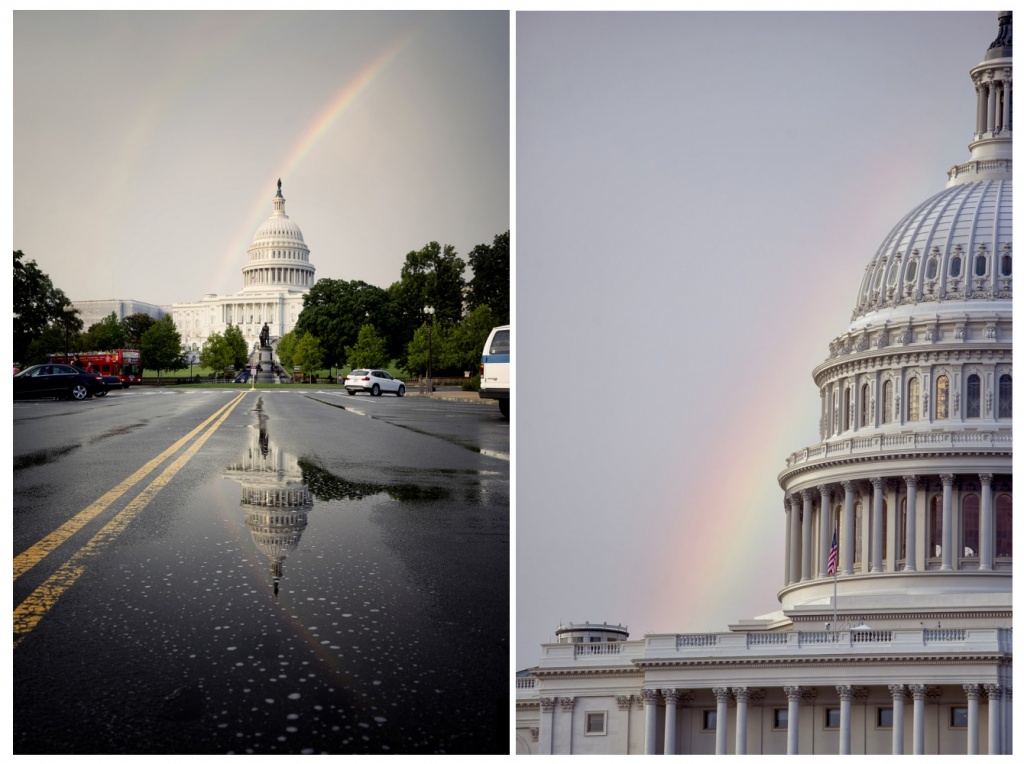
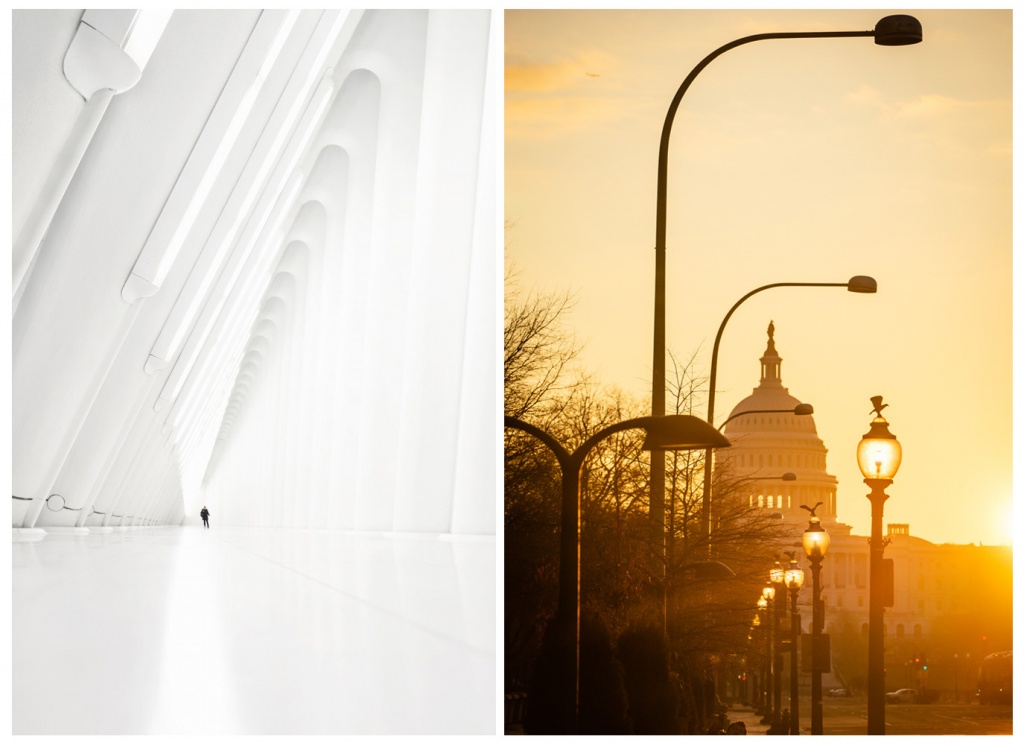
Another reason to get down low. In both of these examples, the Washington Monument looks small in comparison to the other subjects in frame.
4. Sense of Depth
Much like a sense of scale, giving your image a sense of depth can help your viewer read your image a lot clearer. It gives your 2-dimensional image 3-dimensional qualities and allows your viewer to see your image deeper. The best way to do this is to focus on your main subject, what you actually want your viewer to concentrate on and then find different ways of making it 3-dimensional.
There are multiple ways of doing this. For example:
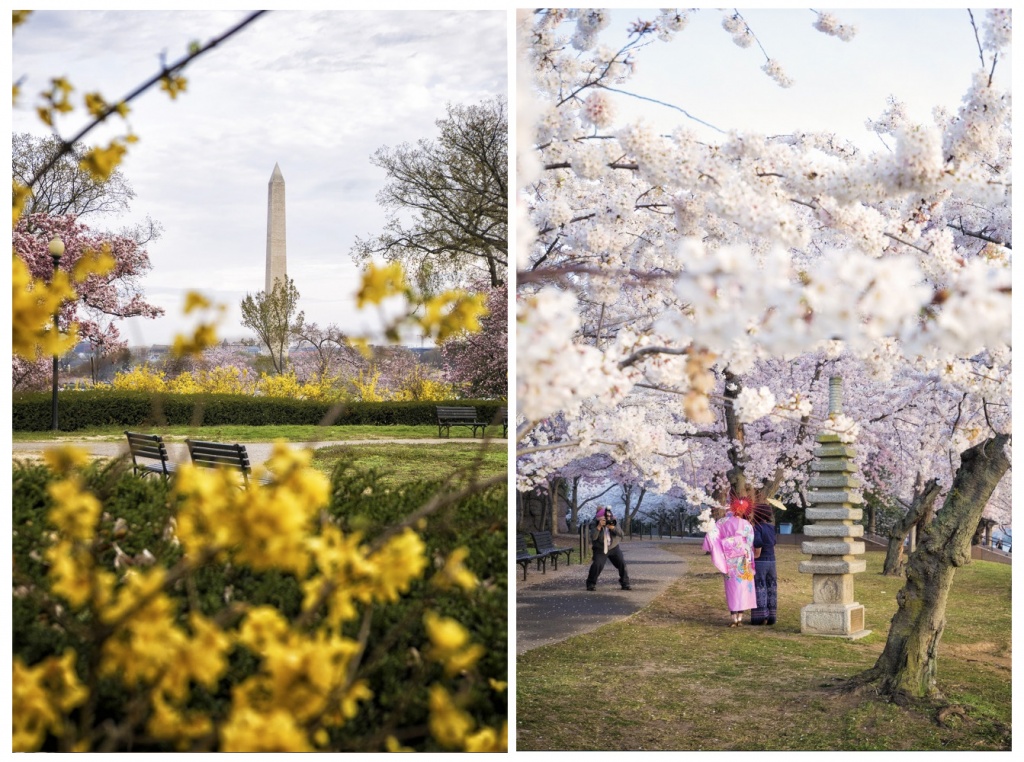
Creating Layers
Layers give your viewer a foreground, midground, and background to concentrate on. The best way to do this is by filling each layer with something interesting to concentrate on, emphasizing each layer.
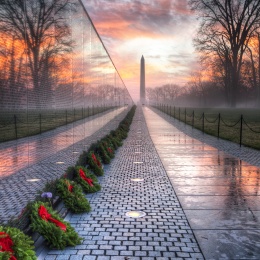
Patterns and repetition can help create a sense of depth making long hallways, roads, or paths look even longer. Another way to give your viewer foreground, midground, and background.
Leading Lines
Leading lines help your viewer read the image. It makes for an easy path to lead you right to the main subject of the image while adding depth at the same time.
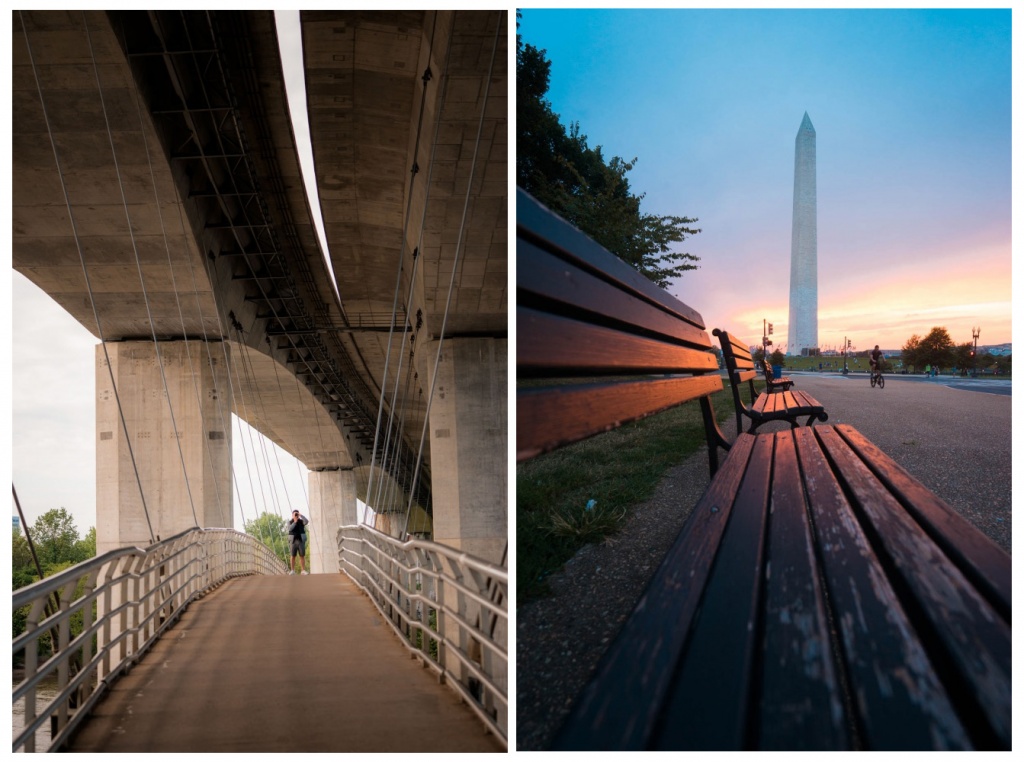
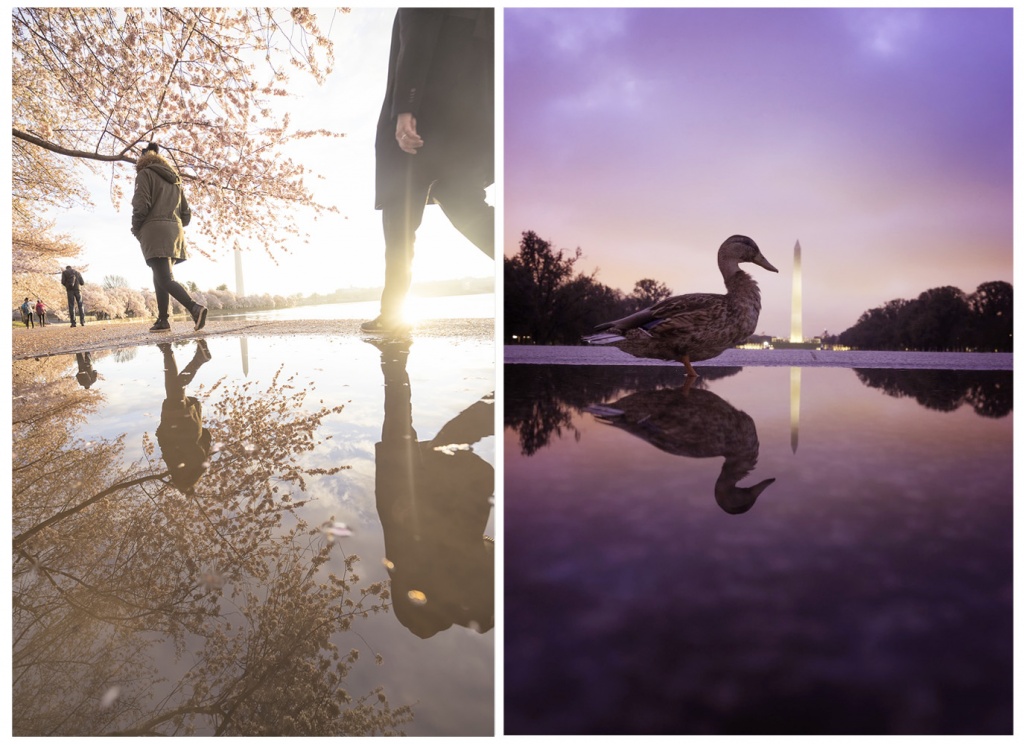
They don’t have to be straight lines. They can be implied lines too. (L) All lines point to the photographer standing in the middle of the bridge (R) The lines of the park benches lead your eyes directly to the Washington Monument in the background.
Out of Focus Elements.
The out of focus elements really makes you look past the elements that are out of focus into the ones that are in focus. It also helps when you can still read the shapes out of the out of focus elements to figure out what they are.
Helps isolate your subject so you’re viewer knows exactly what you want them to focus on, as well as showing some distance between the camera and subject.
5. Simplify Your Image
This is definitely the hardest idea to practice out of them all. The reason it’s so difficult to simplify your image is that your eyes can see a lot more than your camera lens. Your peripheral vision is about 100 degrees on each side. Even with a wide-angle lens, your camera can’t see as much as your eyes can, and it’s your job as a photographer to reduce what you are looking at down to the essential parts of your scene.
Simplifying your image gets rid of all the distracting elements and focuses your viewer’s attention. When things are too chaotic, it gets difficult to see which automatically makes you want to turn away.
To simplify your image try cropping or zooming in closer to the subject, filling the frame with only the necessary information.
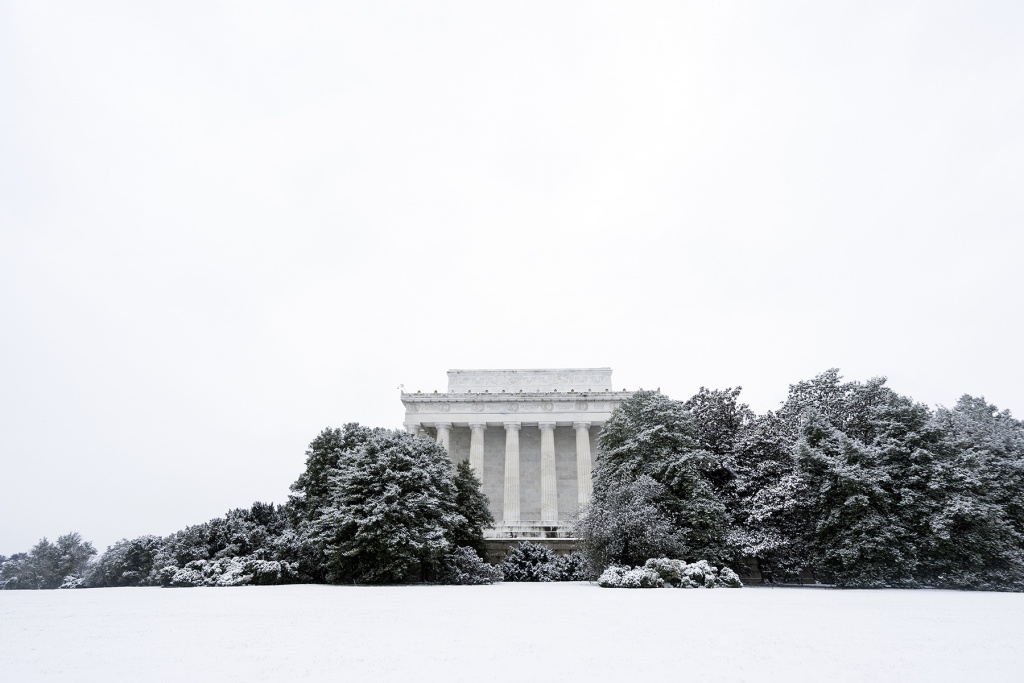
I could have included people, traffic, patches of grass peaking through, and much more. But reducing this image down to the basics gives this image some peace and quiet. What I think of on a cold, snowy day.
So I hope you enjoyed these tips on how to take better travel photos. Whether you’re traveling near or far, these tips can help you create some interesting images. If you use any of these, please let me know. I would love to see the end result.
Want a part 2? Let me know in the comments below!
Happy Snapping!