Guides

All photos available for print and licensing >

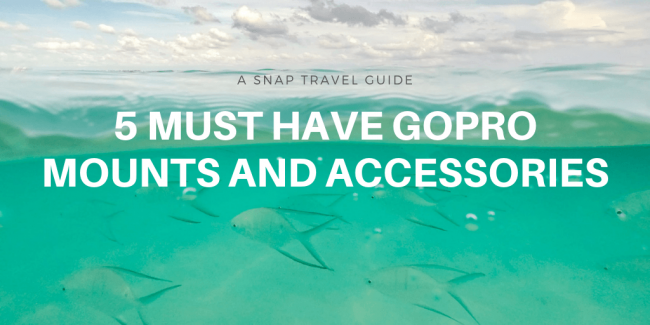
Here are my top 5 favorite GoPro Mounts and Accessories for travel and adventure photography.

If you are looking for a super simple way to capture water sports, time lapses or just have a different perspective for your images and videos, read on…

My personal GoPro journey started when I got the GoPro Hero 2 in 2011.

My husband, Andrew and I were starting to get more and more into scuba diving and I wanted to have an easy way to capture what we were seeing underwater. Of course, I could have gotten a housing for my DSLR camera, but it wasn’t really something I wanted to invest that much money in. In order to get quality housing for the camera, it had to cost as much as your actual camera. We don’t live near a beach so I was skeptical to pay thousands of dollars for something I could only use one or two times a year.

Plus who has time to mess with lighting, flashes, and settings when you’re just trying to scuba diving for fun. All the fishes would have swum away by the time you had your focusing correct.

turks and caicos, gopro, polarpro, fiftyfifty, under over camera, dome, caribbean, school of fish, underwater, travel, vacation

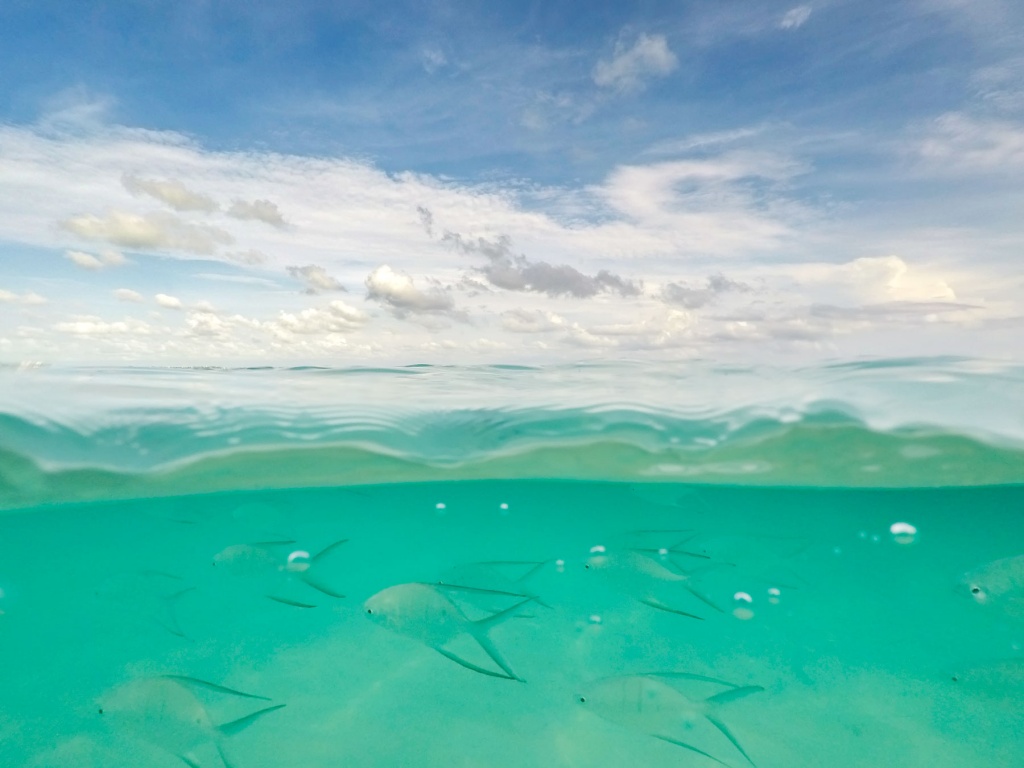
Captured with a GoPro Hero 5 and the Fifty/Fifty Dome by PolarPro

So as an alternative I always had an underwater point and shoot cameras that lasted half a year. Or I would buy a separate underwater housing for point and shoot cameras. Even then the cameras never lasted as long as I thought they should have since they had been underwater. So that was reason number 2 why I didn’t want to risk the same thing with my DSLR camera.

But when the GoPro first came out, I remember being amazed. This tiny camera fits in the palm of my hand, it takes amazing pictures, AND I could take it underwater! Slap on an underwater housing with the red filter (to neutralize the color) and my underwater images were AMAZING! I was hooked ever since. Unfortunately, I can’t find any of those images of those early on videos. If I happen to stumble upon them one day, I’ll update this post. But this is not to say the quality of images will be the same as a DSLR camera underwater. This was just the easiest, solution for me. The DSLR images will be far superior.

I loved having a small adventure camera to go underwater or carry around with me and not worry about dropping or messing it up. Just the way that they are built they seem so rugged that can take falls, scrapes or pretty much anything you throw at it. Perfect to take anywhere if you just want to throw it in your backpack quickly.

Since the evolution of the GoPro cameras, you don’t even particularly need underwater housing anymore. The GoPro is waterproof and as long as you’re staying above 33 ft (10m), you should be good to go without any kind of underwater housing. But with housing, you can go down to 196ft!

The best part about GoPro cameras is all the different mounts and accessories that go along with the camera. OMG, the possibilities are endless and SO MUCH FUN. 

I may have had the GoPro Hero 3 as well. Now I’m at the GoPro Hero 5 Black. I love this little camera.

So with all my adventure camera experience, here are my favorite mounts and accessories that I have used to capture some of my favorite travel images and videos:

Side note: In my opinion, I would skip out on the Accessory Kits you see on Amazon. There’s just so much in them and I’m pretty sure you won’t even end up using half of the screws and mounts that you get with them. It will just end up as a pile in your closet.

After using your camera a few times, you’ll get an idea of what kind of images you’ll want to capture and just purchase those mounts or straps that will help you accomplish that idea.


Head Strap

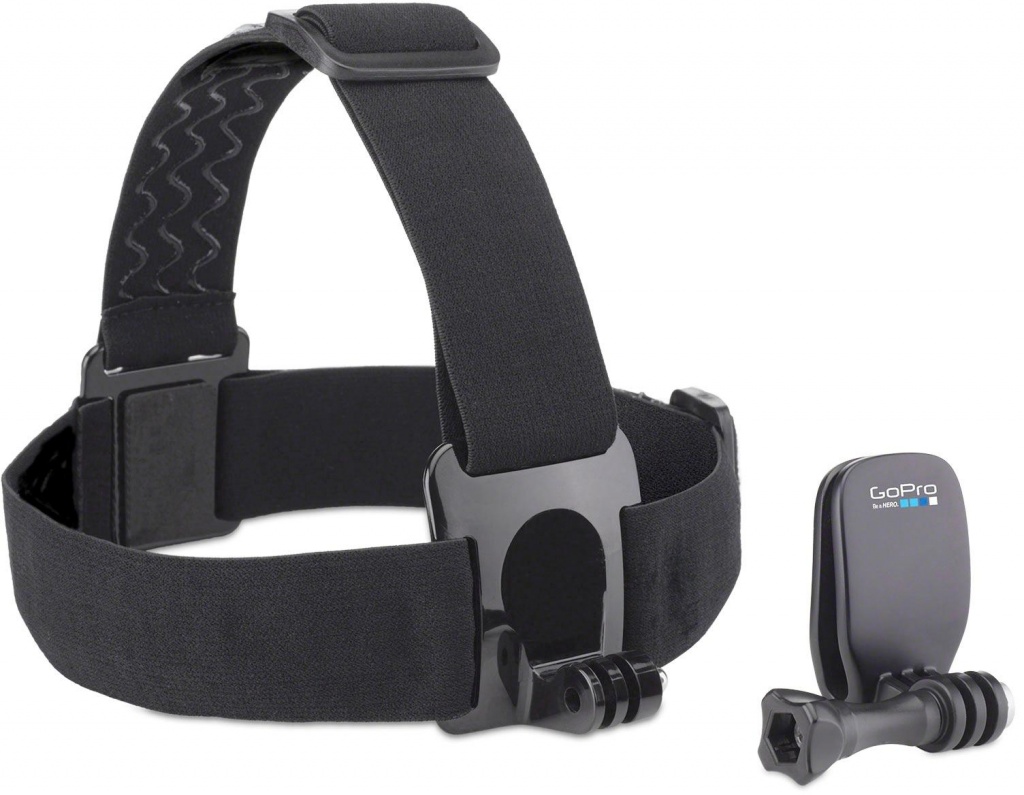
GoPro Head Strap and QuickClip

You may feel a little ridiculous walking around with this thing on your head but the unique perspective is my favorite part. I love how it keeps you hands-free PLUS you can include your hands in the shot. That way your viewer can see exactly what you’re doing. Perfect for any kind of tutorial videos or just giving your viewer a little more personal view of what it’s like being at your travel location. I used to use this strap a lot when we were scuba diving but now I use it for fun photo walks or on long hikes in mountains.

Click here to view the head strap on Amazon.

Here’s a video example of what it’s like with the head strap perspective. Start at 0:44.

Click here to read more

All photos available for print and licensing >

I just got back from my second trip to Chicago but my first real time visiting with a camera in my hand. I booked this trip with the intention to scout out photo locations for our upcoming photo workshop in Chicago. I wanted to get a feel for the city and the logicistics of getting around. So if you’re interested in joining me for a week in Chicago, click here.

In general, I loved visiting the city. Compared to New York City or even Washington DC, it’s a lot quieter as far as car noises and even people walking around. It’s so photogenic, meaning everywhere you turned could be a great new image. With the so many different elevated views, it was difficult to take a bad picture. I especially liked being among the skyscrapers. Even during the middle of the day, you can find some very interesting shadow play. Overall you can’t go wrong with a photo adventure in Chicago – even if it’s just for a few days.

Side note, they don’t call it the “windy city’ for nothing. Even on a nice, sunshining day, it can get really cold with the wind. I highly suggest packing at least gloves and a hat in your camera bag for those just in case moments. You don’t want to let being too cold be the reason why you don’t capture your shot. I was there at the very end of March and I wore my gloves everyday.

So we had a good 72 hours in Chicago packed full of photography. Here’s what we did:

Click here to read more

All photos available for print and licensing >

Being from the east coast, I love our annual getaways to the west. Sort of like how birds migrate to the south for winter, I like to migrate the west and soak up the California sun and surf. Plus any excuse for a fresh acai bowl, amirite?

To be honest though, San Diego is one of my favorite places to be. I love the vibe of the city, everyone is super friendly and there’s no shortage of things to do. You have the beach life but also a fun downtown area if the city is more of your scene. It’s all of that plus a super dog friendly city. Frankie loves taking his morning walks on the beach, you basically have to drag him off the sand.

This was our second year in a row visiting around the start of the new year, but I have visited many times in the past too. This will definietly not be our last time visiting so keep checking back as I update this guide.

So if you’re heading to San Diego, here are the best places to take pictures:

The Beaches

This past trip we stayed at this beautiful airbnb right at the tip of Mission Beach. It was the perfect place for us because we were able to enjoy the beach in a less crowded environment but still have views of the water.  (If you’ve never stayed at an airbnb, I highly recommend it. Especially if you’re going somewhere for an extended stay. It’s all the comforts of home while you travel.) Morning runs were peaceful on the boardwalk and Mission Bay was right behind us which made it fun to fly the drone for a satisfying perspective of land and water. But if we wanted to check out some of cool restaurants on Pacific Beach, we were just a 15 minute scooter ride away.

One of my favorite parts about Pacific Beach was standing at the end of Crystal Pier. The pier allowed for unique, overhead shots of the wave riders and definietly provided a lot of great photo opportunities. And you can usually find the bubble man around sunset. I love watching the huge bubbles fly in the air and can’t resist trying to pop some if they float in my direction. The kids love them too!

(left) view from Crystal Pier (right) bubble from the bubble man framing a palm tree

Click here to read more

All photos available for print and licensing >

Washington DC is ideal for sunrise photography.

I’ve lived in the area my whole life and been photographing the National Mall for over 8 years. I’ve pretty much been to every one of these places at least 20 times. So I compiled the top 7 best spots to make your trip to the Nation’s capital easier to navigate.

I’ve done all the research for you so you can just get out there and shoot. Here’s everything you need to know to capture a stunning sunrise in Washington DC:

How to Prepare for Sunrise

I love the alignment of where the sun rises among the monuments as opposed to where the sun sets from. It gives off this amazing warm glow on the memorials that’s hard to get at sunset. Plus there is this overwhelming feeling of peace and calm in a city that’s usually hustling and bustling during the day. At sunrise you’re more likely to get images with no one in them while at sunset it’s nearly impossible.

Don’t worry though even if no one else is around, park police have the memorials under constant surveillance which makes this one of the safest places to be in DC at night. If anything bad should happen, help will not be far away.

I typically try to arrive at my sunrise location about 30 minutes before the sun actually rises. That way you will see all the great predawn colors in the sky. Dress according to the weather and grab a coffee, you won’t regret it.

For the serious photographers out there, you may be wondering about tripods. For the most part they are not allowed. However if you’re photographing sunrise and there is no one else around, you could probably get away with it. I think the biggest concern is when the memorials are crowded and other people may trip over the legs. Out of all the times I’ve been out for sunrise (trust me it’s way more than I can count), I have been asked to put it away once while I was at the Lincoln Memorial. All other times other than sunrise at any of the memorials, it’s pretty much out of the question.

The United States Capitol is slightly different. Technically, it’s not the National Mall so the same rules don’t apply as they do at the memorials. There is way more security there and I’ve heard conflicting rules about tripods. The last time I spoke to a Capitol Policeman about it, he said they are allowed. However since then I’ve heard of photographer friends being asked to put it away. It seems like there is no right or wrong answer so I would just take your tripod if you want and just be respectful when photographing the grounds. The worst that will happen is that someone will ask you to put it away.

One last thing to note, I wrote a book all about photographing Washington DC. It’s called Snap DC: Your Guide to taking Extraordinary Photos of the National Mall and Beyond… and it is available on Amazon. So if you are interested in seeing more of Washington DC than just the sunrise, click here to check it out.  As an added bonus I created a 1, 3, and 5 day sample photo itinerary for your trip to Washington DC, click here to download my ideal schedule.

Now on to that sunrise…

You Can’t Go Wrong with the Reflecting Pool

In my opinion, the Reflecting Pool is the ultimate sunrise location in Washington DC.  It’s the most iconic and it is the place that I tell everyone they must go to if they have never been to the national mall and especially at sunrise. It’s the center of 4 great landmarks all within a central area. A one stop shop if you will.

Click here to read more

Sony Alpha A7II Mirrorless Digital Camera

I got this camera when it came time to replace my Canon 5d Mark II. Coming from a heavier full frame camera to this mirrorless dslr, I could not have been happier. It just fits so perfectly in my hands. I’ve been using it for 4 years now and knowing all the settings and where each button is just second nature to me now. However my favorite part about the camera is how lightweight and small it is. It’s so easy to travel with and just throw it in my backpack when I’m not using it. I used to feel back and shoulder pains when I would carry the 5d Mark II around but I haven’t felt that with my Sony A7II. I’ve taken it hiking and even got caught in a rainstorm with it. It’s a great durable, reliable camera.

iwo jima, lightning, storm, clouds, rain, arlington, virginia, va, reflection, rain,
Although the camera isn’t waterproof, it is weather resistant. I’ve taken it out with me during rainstorms, snow storms, all kinds of weather and never had a major issue. I have these camera sleeves just in case, but never had to use them while out on the field. I mainly have them so I can cover my camera while it’s in my un-weatherproof backpack or purse. My camera settings for this image is F5.6 1/30 sec ISO 640 with 16-35mm wide angle lens handheld.

Click here to read more

All photos available for print and licensing >

Just got home from an amazing trip to Norway. It was honestly one of the best trips I have ever taken! The scenery, the culture, the experience was something I will treasure for a long time. But it took a lot of time and research to plan the whole trip. So I thought I would take some time out and lay out everything I did to prepare for the trip to help future travelers.

Side note: This trip was Andrew and I’s big trip for the year but he didn’t plan any of it. He was so great that he let me plan whatever I wanted to do and he was going to be ok about it 🙂 So obviously I planned this trip all around taking pictures. 

To be honest, I didn’t know much about Norway before I booked this trip. Obviously I have seen some stunning images of the country on Instagram but it wasn’t until I was saw this one old episode of the Amazing Race that really got me interested in going. I know, cheesy but true. The very next day I received an email from TravelZoo with a promotion to travel to Norway. I figured that if that’s not a sign, I don’t know what is!

Prior to booking, I read that the best landscapes were along the west coast so Andrew and I booked round trip tickets to Bergen for a week. From then on I was all over pinterest and tripadvisor looking for recommendations of what to do in Norway but in the end it was the advice of my friend, Frithjov who helped out the most.

The Goal:

  1. To drive as much of the Norwegian coast as possible without being in a car all day
  2. Not have to drive past the same sights when traveling back to Bergen
  3. Some short hikes here and there would be great

Frithjov asked one of his friends for recommendations and laid out an ambitious itinerary for us including Kristiansund, Dombås and Odda.  But I did not want to have to be on a very strict time table. So after a lot more research and several changes, here’s what our more relaxed schedule finally ended up being

Side note: Booking a ticket on the Hurtigruten was key! It’s a cruise ship that stops at many ports along the west coast of Norway. Luckily you can customize your travel with shorter segments. I’m so thankful for that ship and the ability to bring back the car with us back to Bergen. So booking this ship was the first thing I did and the rest of our travel based on the fact that we were going to take it from Ålesund to Bergen at the end of our trip. Consider goal #2 accomplished.

Click here to read more